Showing posts with label carbon. Show all posts

Friday, June 17, 2016

Seats (Part 3)

Continued from Seats (Part 2)
I've spent the past few weeks making some solid progress, although it doesn't feel like it. I cut the carbon fiber seat pan to its rough shape, and cut the channel for the elevator pushrod to run through. I've also got a piece of foam cut to shape as a former for the carbon fiber to lay over the channel, creating a tunnel to protect the pushrod from debris (and from being stepped or sat on.)


I wet out two layers of CF, wrapped them around the foam tunnel former, and slid that into the slot I cut.


Once that cured, I removed the foam and flipped the seat over. I wet out two more layers of CF (for four total) and laid those over the tunnel from the last step. This would have created a void at the forward end of the tunnel, so I filled it with a really thick micro mixture ahead of time.

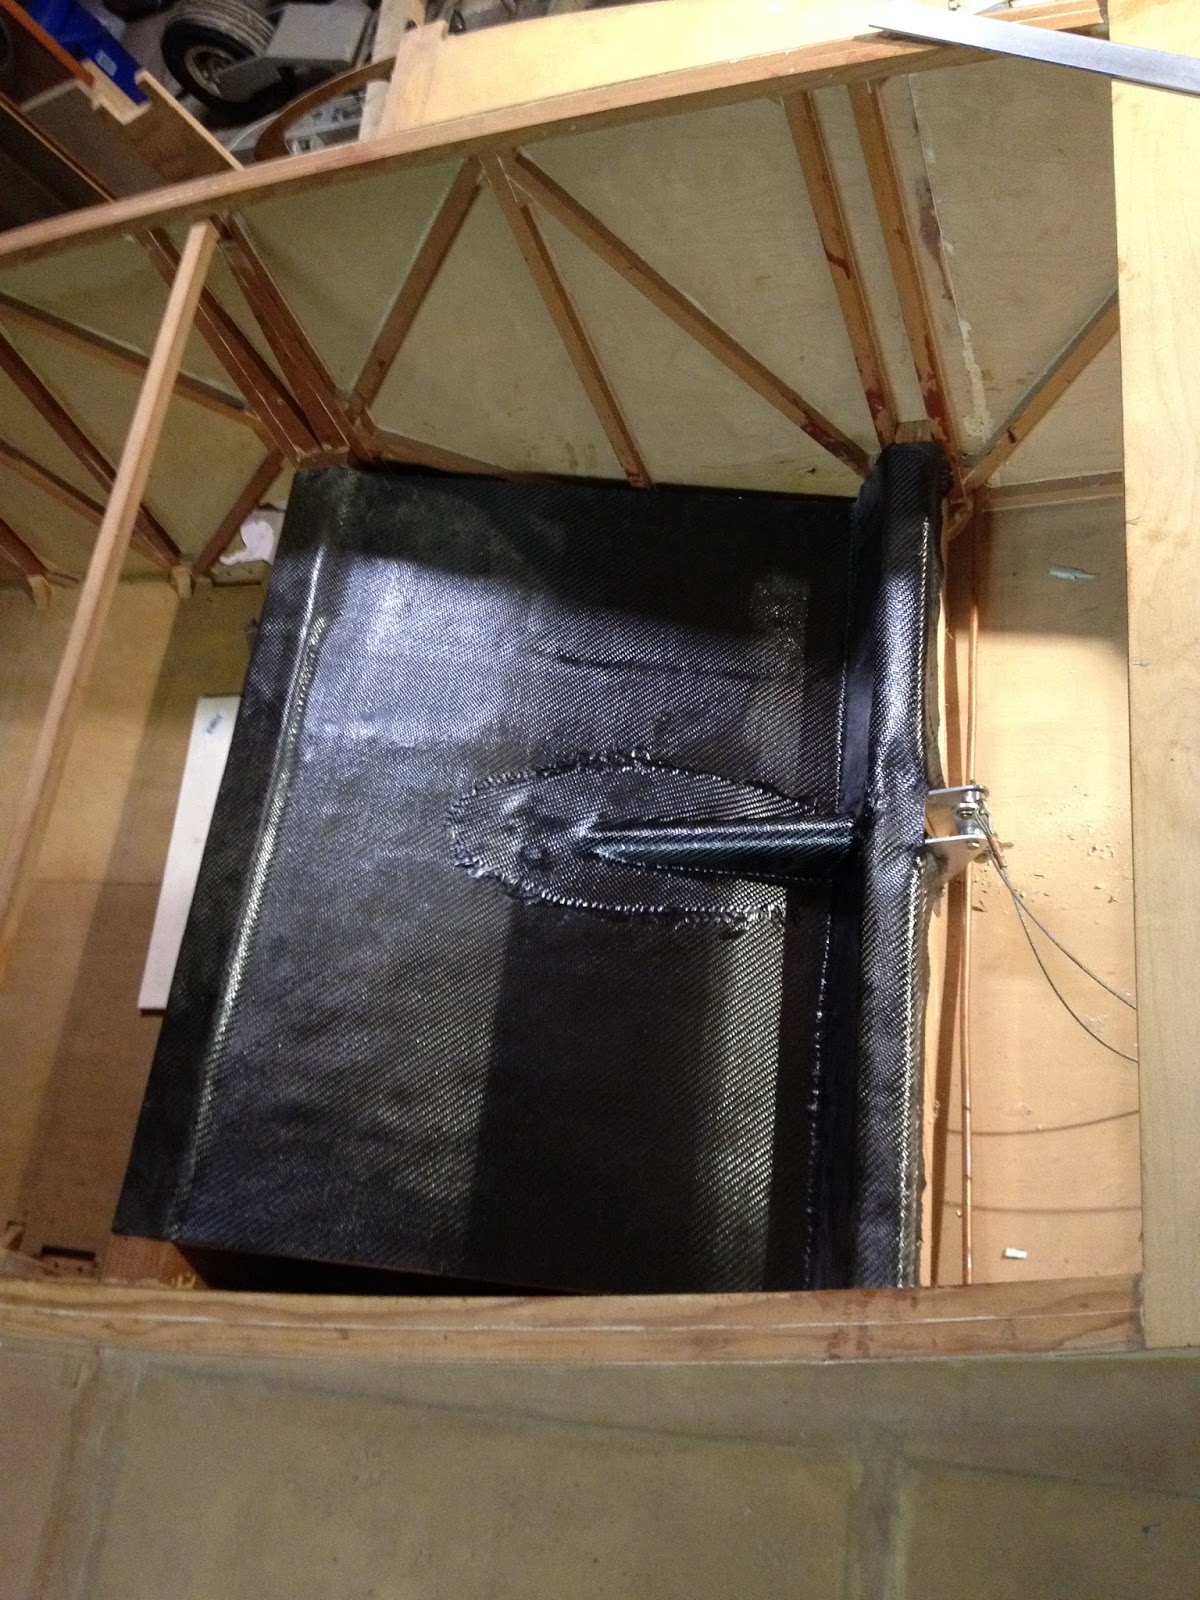


 It looks in the picture like the CF over the tunnel has sharp edges, but they're all quite flat and smooth in real life.

I tried to do the seat back next, using some left over foam from my wing tanks. That was a disaster, and I mostly just wasted time and resources on learning how *not* to lay up fiberglass. I may write up the long version at some point, but I'm not sure anyone else is dumb enough to try it as many times or as many ways as I did before giving up (or getting it right.) Long story short, plastic bagging is a perfectly viable fiberglassing option, but like everything else in fiberglassing, it has to be done just right. So far I haven't figured out how to do it just right. So I'll go back to fiberglassing the way I usually do, because I really want repeatable results (and I really want a seat back!)

Saturday, May 28, 2016

Seats (Part 2)

Continued from Seats (Part 1)
I spent a lot of time prepping for the actual carbon fiber layup. Some of my brackets didn't fit quite the way I'd like, so I did a lot of fiddling to get everything right. After that, I trial fitted and then shaped the seat to fit exactly how I wanted it.


Once I was satisfied, I began using duct tape and plastic drop cloth to protect the fuselage from any epoxy drips.


After one more trial fit, I got ready for layup. Two layers on the bottom, two layers on the top, each with one layer 45 degrees to the other. I wet out the carbon fiber between two sheets of plastic in order to keep the carbon fiber layers from shifting. It didn't work as well as I hoped, and the epoxy was beginning to set up before I had it on the foam. Apart from that, the process went fairly smoothly. Seat went onto the bottom layers, which was then lifted into position in between the spars. The top layers were then placed on top, and everything was pressed together and smoothed out, then left to cure.

Final trial fit:


With carbon fiber and curing:


After it was cured, I gently but firmly removed the seat from the plane. Next I'll need to cut out and add a tunnel for the elevator pushrod, holes for the control sticks, and then work on the back of the seat.

I found a picture of the plywood cutting process, and am uploading it just for my record below.


Wednesday, May 25, 2016

Seats (Part 1)

After two solid months of doing little nothing projects here and there and generally not accomplishing very much, the weather finally got nice enough to start doing some fiberglassing. So I decided to build my seats next, because 1. it's a smaller fiberglass project to get me back in the swing of it before I tackle the wings, and 2. once I have the seats in place I can set my rudder pedals, my control sticks height, canopy and therefore aft deck height, and also sit on it and make airplane noises. I'm using carbon fiber for its strength to weight ratio, and because the seat giving way in flight would cause the airplane to be uncontrollable, so I want it as strong as possible. At this point I intend to build as much of the plane with vinylester resin as possible, because it cures very fast compared to just about every viable epoxy I've tried. However, there's some solid research that suggests vinylester doesn't bond well with carbon fiber, so I'm using West Systems epoxy instead. West Systems is fantastic stuff, but it takes about 6 hours to cure at 70* F, and that time goes up dramatically as temperature goes down. This week is all warm days, so I'm gonna try to knock this out before the end of the week.


I started with ½" foam, sliced into 2" strips. I epoxied 3/32" plywood in between each strip, so the strips of wood and foam are oriented length-wise in relation to the aircraft.


Once that had cured, I cut the panel into two pieces, one to match the seat back, and one to make up the flat bottom of the seat. I also built about the crummiest looking jig you could imagine to get the angle of the two pieces right, but it worked out just fine for my purposes.


I didn't get a good picture of it, but I cut slots right next to each of the wooden stringers in both panels, then used that same 3/32 plywood to make biscuits to fit in them to really strengthen the joint. Once I had them all prepped and trial-fitted, I mixed up my epoxy and went to work. Obviously no pictures of the process, but it was messy and the epoxy gets hot in the cup pretty quick when it's 80 degree weather. No misadventures, however, and with a carefully calibrated weight on top, and carefully calibrated heat lamps in place, the curing process could begin. Tomorrow I hope to begin laying my carbon fiber and start making this look more like a fancy seat for a composite aircraft (and less like I have no idea what I'm doing.)
Continued in Seats (Part 2)