Showing posts with label contour. Show all posts

Sunday, August 14, 2016

Outer Wings (Part 3)

On the left wing, I tried to modify the plans method to make it easier on myself. I cut out foam nose ribs that, rather than stick all the way out to the leading edge, only stuck out far enough to support the foam planks. Unfortunately, they weren't quite right, and it caused a lot of headache and frustration trying to rip out and replace foam. So this time, I did it a little closer to the plans method. Glued foam nose ribs in place, but then sanded them to the airfoil contour before adding the rest of the foam. It worked quite well, and was much easier than trying to work out the geometry of the nose supports changing size, length from the spar, and angle changes for washout.


Foam planks being cut and placed:


Once in place, I began the arduous sanding process yet again.


Honestly, it only took a couple hours, including frequent hydration (read: lost motivation) breaks and several "Is there *any* other way that would be *slightly* better?" pauses. One of those gave me the idea to cut slits along the entire length of my aluminum angle sanding block, and use that edge as a saw. It worked fairly well for large chunk removal, as long as you were careful not to cut too close to the final shape.


Eventually, I did manage to finish sanding the top of the wing (although not perfect - thank goodness for micro!) and got ready for another round of glassing. It's been so hot, I've been getting all of my supplies ready and all of the prep work done in the evening so I can get up early and finish glassing before 9 or 10 AM. Any later and the vinylester just sets up too fast. One interesting thing with vinylester that seems different than any other two-part system I've used - if the vinylester is gelling, and I'm not quite ready for it to set, I can actually add a little extra time by adding a little more vinylester (with hardener added, of course.) Not sure how or why, but it's saved me from a lot of repair work a couple of times.

I didn't get any pictures of the process, but it went like this:
Step one: micro from the front spar back to the trailing edge (skipping the spars)
Step two: lay one layer of 5.8 oz cloth and one layer of 1.5 oz cloth on the micro'd area, wet out completely
Step three: micro from the front spar forward and underneath, two inches past the chord line
Step four: wet out two layers of 5.8 oz cloth on a piece of 2 mil plastic, then lay the cloth in place on the leading edge of the wing. Much, much easier to do one layer at a time, otherwise you risk wrinkles in the bottom layer that are pretty impossible to get out once the resin begins to set.

The result is quite good, with very very few bubbles and only one small wrinkle. If the thunderstorms stay away long enough tomorrow,  I'll pull the plane out of the garage and flip it, then begin gluing foam around the bottom leading and trailing edges. Beginning to get excited about my progress, and I think I've figured out how I'll do my wing tips next.
Continued in Outer Wings (Part 4)

Outer Wings (Part 2)

Continued from Outer Wings (Part 1)
It's been a month, and I've been making progress. I had some foul-ups, which required tearing foam out and replacing it, but nothing too major. The following pictures show me finishing the main portion of the left wing.

Adding micro and foam to raise a low spot:


Glassing the top:


Flip the plane and repeat. Notice the two holes in the bottom - these were cut to address some slight leaking issues with the fuel tank.


I used a hand plane to shave a little bit of the spars off, so they were at or below the airfoil contour. You can see the wires poking out that I ran for wingtip lighting.


Originally I planned to build a tricycle gear, but decided to go with tailwheel instead. As a result, I needed to change the location of my sump drain on this wing. The original drain will remain plugged rather than torn out and re-glassed, because its proximity to the tank wall makes me unsure I could do so without causing more leaks.


One down, one to go. I learned a few things this time that will make the second wing easier... I hope.

Saturday, June 18, 2016

Wing Walks!?

I've ordered and received a whole bunch of foam from Dynamic Systems (aka SunMate), which I chose as a crash safety measure as much as I did as a comfort aid. I've been cutting away and shaping, but I've gotten to a point where I need to be doing a lot of sitting in the seat and seeing if it's comfortable yet. Only problem is, the plane has no wing walks.... and as challenging as it was to get in the plane standing just on the rear spar, that was preferable to setting up a makeshift seating setup outside the plane. I decided, since I need wing walks eventually, I might as well get them knocked out now so I can get this seating stuff taken care of.

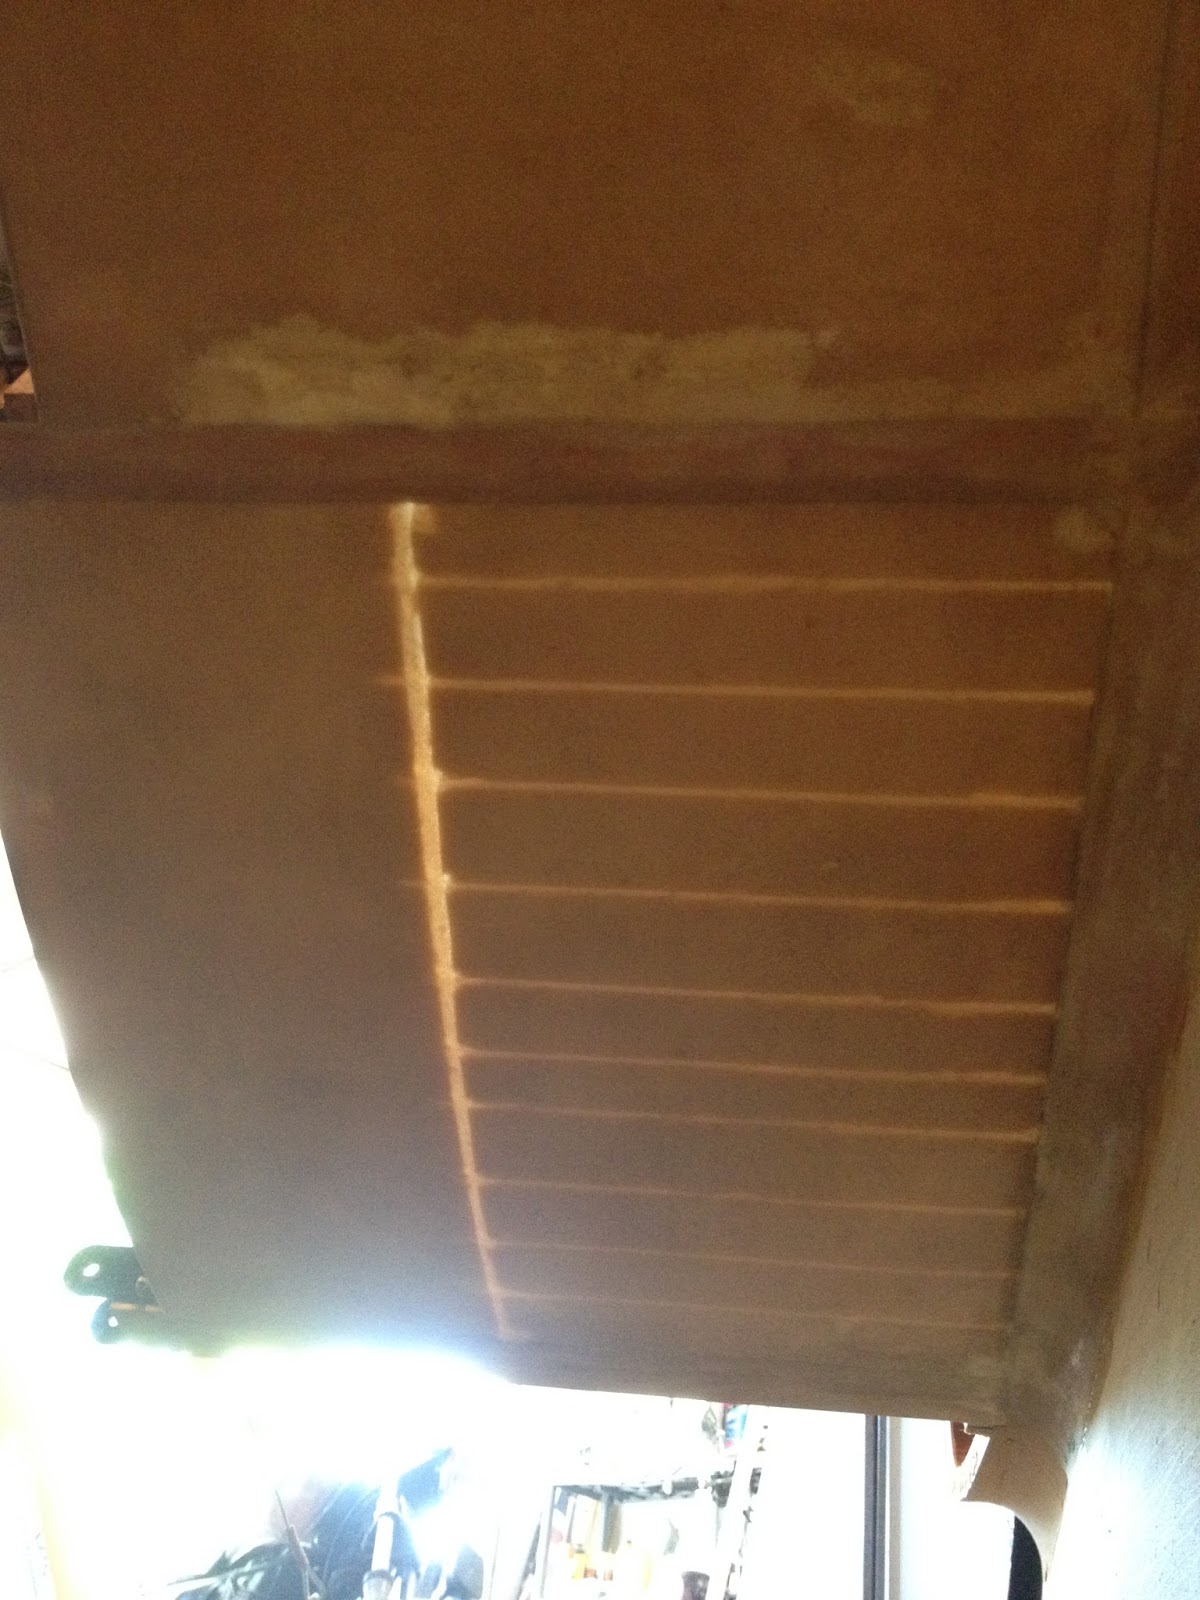
The previous builder had glued and shaped the foam for the top of the inboard wing, and laid what appeared to be one layer of FG on it. I didn't want to disrupt the shape of the wing, and I didn't want to completely start over, so I decided to try and add a wing walk structure without disrupting anything I didn't have to. First step was to flip the plane over and get a good look at the underside.

The previous builder had used a single sheet of 1" foam, and cut slits halfway through it about every 2 inches in order to allow an easy curve to the shape of the wing. This was about how far apart I wanted to put supports, so I started by using a razor blade to extend the slits all the way to the fiberglass skin. I made my wing walk 12" wide, and it runs from the front spar to the rear spar. I dug out the foam in the slots, then cut another slot for a support to run lengthwise from spar to spar. I used ⅜" a/c plywood for the long support, and 3/32" a/c plywood for the rest of the supports. All the supports are 1" wide.


The last step before epoxy(or so I thought...) was to cut slots in the foam for two ½" spruce blocks to (drastically) increase the gluing area for the ⅜" main support.

When I test fitted the supports, I noticed that my long stringer (which was cut very, very precisely to the airfoil contour) didn't touch the skin in a lot of places. As in, ¼" to ⅜" gap. A closer inspection of the wing showed the problem; the foam and fiberglass had sunk, or had been attached too low at the rear spar, and the wing shape was not preserved except at the two wooden templates. I had to think for a couple days to come up with a solution to that one, but I think I came up with a good one. 

I used my hot wire foam cutter and two wooden templates to cut two 12" wide foam templates, one for each side of the wing skin. The outside template I left long enough to rest on the spars, while the inside template I cut about 1" too short so it'd be able to easily drop in place once epoxy was curing. I used some highly sophisticated and carefully calibrated bracing structures (read: spare tires) to support the outside template and, once it was in place, I mixed up my epoxy with some micro to fill in gaps and started inserting all of the supports. Once the supports were all in place, I placed the inside template (with plastic trash bag to isolate it from the epoxy) on the wing, and added a good amount of weight.


When I came back the next day, I was *very* happy to find that the setup had worked perfectly. My wing was now the shape it should've been (or, much closer to it) and the supports were all in place and holding. I mixed up more micro/epoxy and filled more gaps, then laid up two layers of FG and placed them over the structure. Although I'm not sure it was entirely necessary, I repeated the process of weighting the template over this to make sure it all cured with the right shape.


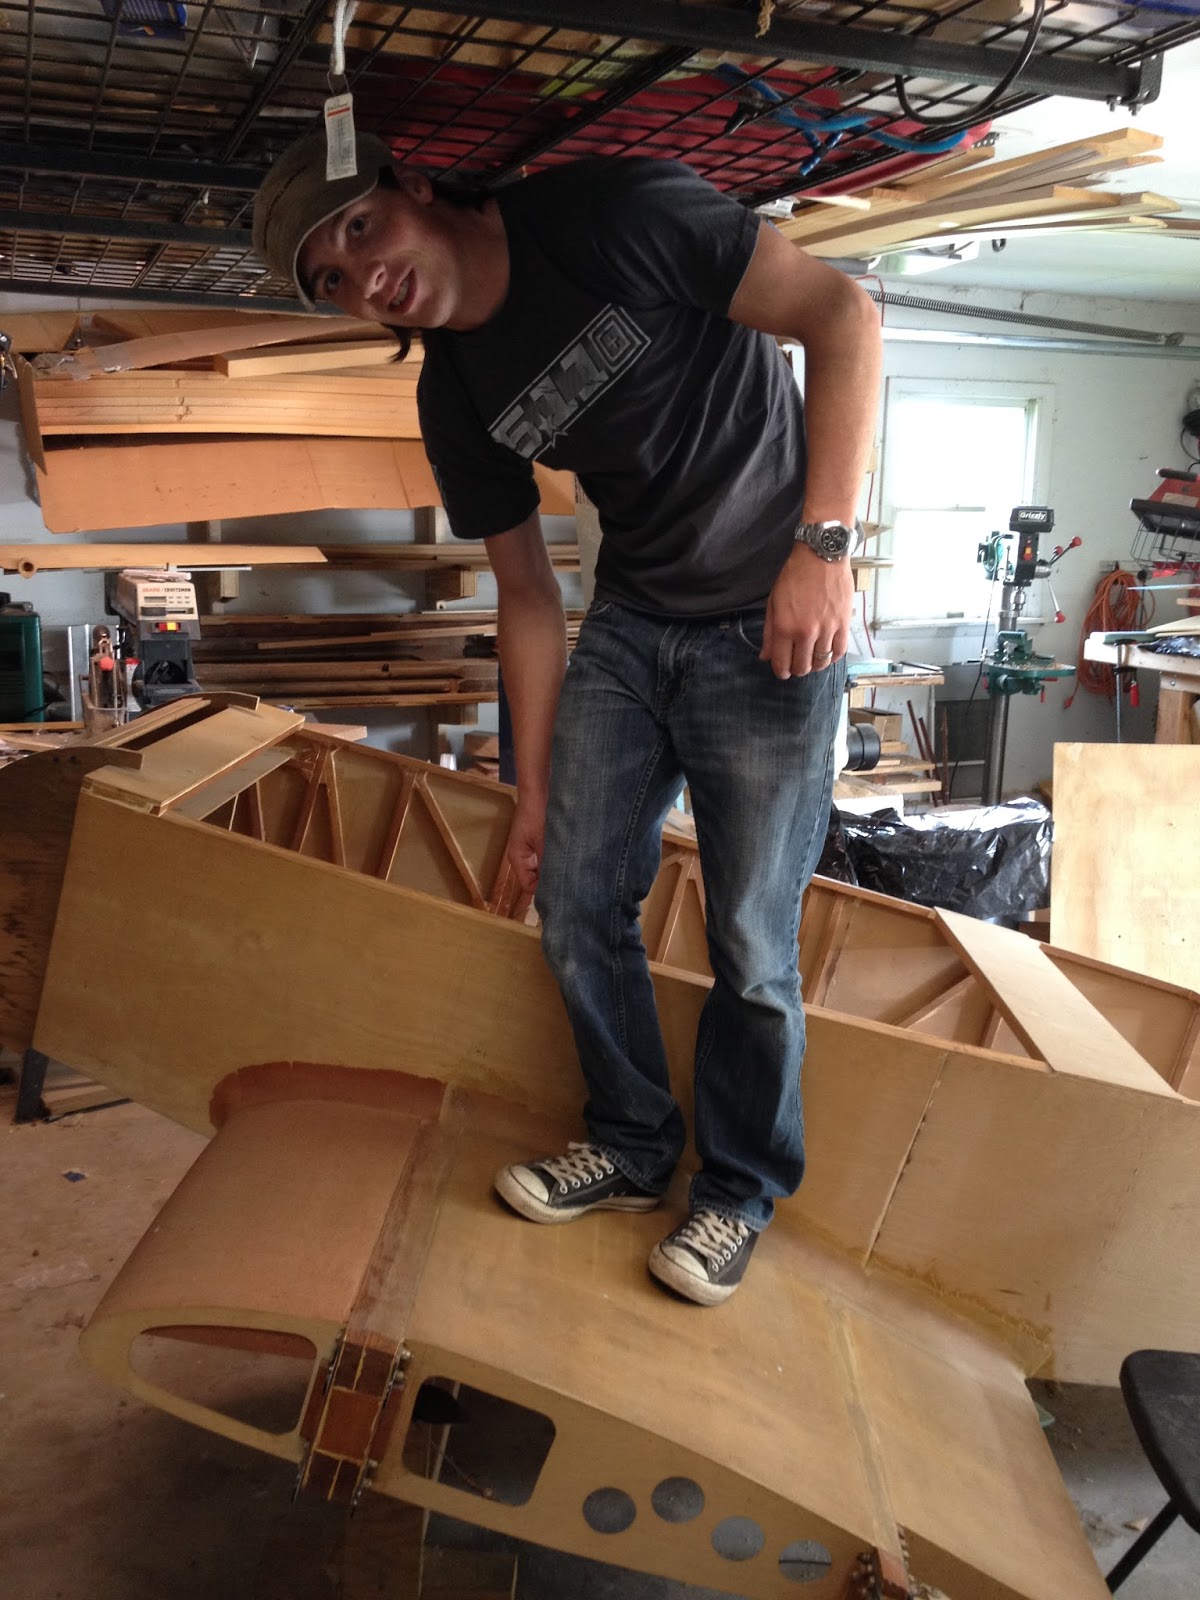
I did the other side the same way, and although the previous builder cut a few more slots in the other side, the results were similar:


The final result was solid. I'll be adding one or two more layers of FG to the top of the inboard wing, but it's already strong enough for me to stand on unsupported with no perceptible give. I'd call this a success.